Nexus 7 initially launched Android 4.1, and opted for Android KitKat update in recent time. As per specification, internals, and hardware specification is of A-one class. If you are looking to restore your Google Nexus 7 to its stock firmware or simply to unbrick it, then this post is what you’re looking for. It is ideal to get back to stock firmware in many cases like the devices becomes irresponsible, got stuck at boot screen, boot loops, or simply behaving unstable.
If you’re facing the very problems as listed above on Google Nexus 7, then most probably, switching back to original stock operating system would be the best choice. This would get your device to 100% original stock firmware, the official one, developed, and distributed by Google only for Nexus 7. First, go through all the pre-requsites listed below, and prepare the device accordingly.
Pre-requisites
- This tutorial, and guide is only made for Google Nexus 7, and meant not to be tried on other device, or phone.
- It will restore your device to stock firmware, it will delete all stuff stored under phone’s memory, and it cannot be undo. We recommend to back up all the stuff stored under the internal memory like messages, apps, games, and contacts. Visit our Android backup solution guide to get it done easily.
- You need a windows based PC with internet connectivity in order to perform this action. Download, and install USB drivers from here. It is necessary to install proper USB drivers.
- Enable the USB Debugging on device. Go to phone’s Settings->Developers options->Check the USB Debugging box to enable it.
- Charge your device to good extent, we recommend to charge at-least 50%.
You may like: Best Free Antivirus Apps
Downloads
Get the →factory image file from below listed options. Download the most appropriate firmware, Android Jelly bean or KitKat based on your needs, and desire from the download page.
→After downloading the desire file, extract it your PC, and remember the location of it. Under it you’ll get “flash-all.bat“, remember it, we will be using it.
How to install stock firmware on Google Nexus 7
- Turn off the device, and wait at least 5-7 seconds.
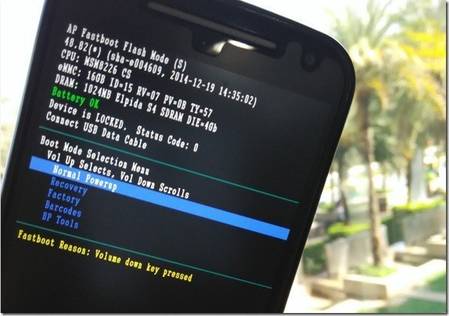
- Press and hold Volume Down + UP + Power keys together for few seconds until the device gets turned on in Fastboot mode.
- Once you get to Fastboot, connect the device to PC using USB cable, and make sure you’ve already installed proper drivers of device.
- From the extracted, firmware file, run the flash-all.bat and let it install the stock firmware on your device. Follow the on-screen instructions if they appear.
- Once it get done, again boot to Fastboot mode (step 2), and then select the “Recovery” mode from the Fastboot menu.
- Under the recovery mode, select and perform “wipe data/ factory reset” operation.
- Then select “reboot system now”.
Now all steps are completed. Your device would be restarting, and take you to home screen very soon. Fill the Google Account settings to get started with Nexus 7. So, that’s all about our guide on how to unbrick Google Nexus 7 using official stock firmware. If you love to play causal games, then you must visit our featured list of Android casual games.