
Since we all have tendencies to do changes with our Android device, sometimes it leads to conditions where we usually get stuck with bricked device. With Android phones, it is very common get such situations where our devices stop working or facing issues such as boot loop, unusual reboots and crashes. The way to get it sorted it flash stock firmware as it would turn your device to factory image and factory settings and same goes with Samsung Galaxy J5 too. Here have this tutorial to flash stock firmware on Samsung Galaxy J5 to unbrick it and make it work again.
If you’ve just bricked or damaged your Samsung Galaxy J5, then this guide would be appropriate enough to get all things sort out and make your device work again. Since the device is launched with Android lollipop 5.1.1 firmware, so the same would be flashed. The most common reason for bricked condition is when try to install custom rom or install custom mods, if they gets flashed inappropriately then most probably it leads to bricked condition and downgrading the device to its native firmware is best way to get ride of bricked condition.
Here we have this easy to follow tutorial that helps to repair bricked Galaxy J5 with stock firmware and you can flash stock in many other cases like, if you are facing performance issues, unusual crashes and bugs, in such case you can downgrade the device to rectify them all.
Before we get started, read all the important pre-requisites mentioned below:
Pre-requisites
- Firstly, I would like to inform you that flashing the stock firmware will wipe out the complete memory of the device and stored data will be wiped out completely and it cannot be restored. If possible, save all the important data to some safe place.
- If you’ve installed custom Rom or Custom recovery, it will be removed and replaced with stock firmware and stock recovery.
- Root access will be revoked if rooted. However, you can easily root it again.
- Make sure to install USB drivers of Samsung Galaxy J5 on your PC. Download them from here.
Downloads
Download the firmware file from below links for your device’s model and make sure to download them according to your region/country.
- Lollipop 5.1.1 Firmware for GALAXY J5 SM-J500FN | Download
- Lollipop 5.1.1 Firmware for GALAXY J5 SM-J500F | Download
Note: After downloading the firmware (.zip file), extract it get firmware files and remember their name and location on your PC / Computer.
- Download Fimware flashing software: Odin 3.0.9 from here and unzip it to your PC/ Computer.
How to unbrick Samsung Galaxy J5 with stock firmware
- Turn off your device.
- Press and hold ‘Volume Down, Home and Power buttons’ at same time and release them when you see Android Logo with warning!
- Now press ‘Volume UP’ to get in to Download mode.
- Now head onto PC, from extracted Odin folder, look for Odin3.0.9.exe file and run it. An Odin screen will appear just like below:
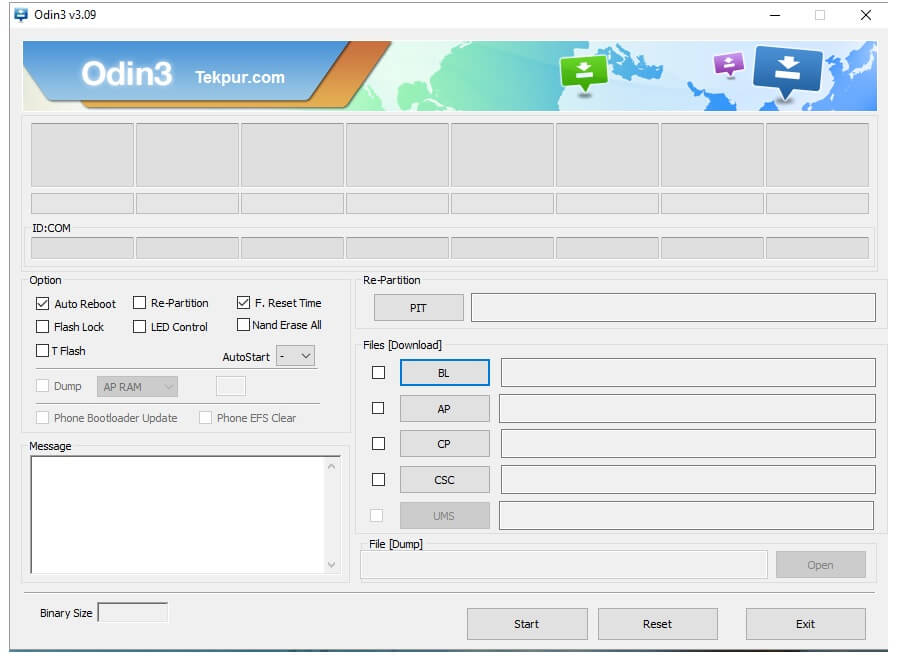
- Now connect your device to your PC using USB cable. Look on Odin program, the ID:Com section should turn to light blue or green. That means your devices has been detected successfully.
- Note: In case it don’t turn, make sure install USB drivers again to your PC and reconnect your device to PC
- Now under Odin program, Select “AP” and then find and locate .md5 file from the extracted folder of downloaded firmware file.
- And don’t make any other change. Let the settings remain unchanged.
- Now, click on “Start” button and wait until Odin done with installation process.
- On success, Pass message will appear on Odin and you’re phone will be restarting. Un-plug your device!

All done! You’ve successfully manged to repair your Samsung Galaxy J5 from bricked condition and now it should be okay and should work perfectly.
That’s all about this tutorial! If you are looking for best applications, don’t miss our list of →best apps for Samsung Galaxy J5. Don’t forget to comment and share if we help you in any manner!
-
![15 Best Free Microsoft Excel Alternatives [2024]](https://androidcure.com/wp-content/uploads/2020/04/Top-Microsoft-Excel-Alternatives-390x220.jpg)
-

-

-

-

-

-

-