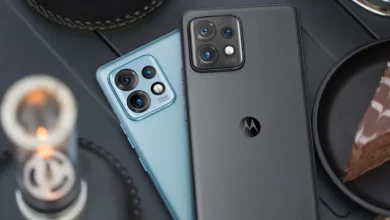
If you have a Xiaomi Redmi Note 10 or 10 Pro you have a range of options for creating great camera shots. A list of best Redmi Note 10 camera tips and tricks.
Not only can you try a range of settings for your photos, but you can also play with different modes to create spectacular videos. And you can enhance all these possibilities even more by applying a number of tricks to customise the functions and adapt them to different scenarios.
#1. Always Have the Camera Functions You Use the Most at Your Fingertips
The Xiaomi Redmi Note 10 has many camera modes, and it’s not possible to have them all visible on the main screen.
So it can be problematic to have to interrupt the scenes you’re taking to look for a certain camera function in “More”. This can be solved by applying a simple trick.
Just go to “More” >> Edit >> Customise and choose Function Layout. In this section, you will be able to choose which camera functions will be displayed in the main menu. Just drag and drop the icons from “More functions” to the “Main screen” section, and vice versa.
Of course, you can change the order of the camera functions as often as you like. So if you know you’re going to be taking shots or videos that require certain functions, you can customise this section before you start your photo session.
Also see:
- Xiaomi Redmi Note 10 vs. Poco X3 NFC: Which Is Better?
- List of useful Apps for Redmi Note smartphone
#2. Customise Camera Colours and Sound
While these options won’t affect whether you take better photos or record great videos, they will allow you to customise some of the details if you want to go beyond the default settings.
From the same “Customise” section you can change the colour seen in the name of the camera functions, and the shutter sound, as you can see in the images.
Just choose the Colours and Sounds sections to find all the available options.
#3. Record Video With Two Cameras Simultaneously
One of the extras offered by the Xiaomi Redmi Note Pro’s camera is that you don’t need to resort to third-party tools to create creative videos. For example, you can use the “Dual Video” camera mode, which allows you to record with both the front camera and the main sensor of the rear camera at the same time.
So you can make a video as a presenter, recording what you’re watching while commenting on camera what you want. That way, you’ll have a split screen of what both cameras are recording.
#4. Remove the Watermark From Your Photos or Personalise Them
If you don’t want your phone to show the typical Xiaomi watermark, you can easily remove it from the Camera app settings.
To do this, go to Camera settings >> Watermark. If you don’t want “SHOT ON MI NOTE 10…” to appear, then disable the “Device watermark” option. But having Xiaomi visible on photos is not the only option you will find, so you can try other combinations.
For example, if there are photos where you want the date and time to be visible, then activate “Add date and time on photo”. On the other hand, you can create your own watermark, as you can see in the image:
You can use your name, brand, short phrase and even use emoticons for your personalised watermark. But there is one detail you should take into account, and that is that the model of your Xiaomi will appear together with your text.
But it will help if you want to make it clear that you own the photo when you share it on social networks.
#5. Activate Google Lens From the Camera
I’m sure you know that Google Lens has a lot of functions that can save you in more than one occasion. You can translate any sign you find on the street, identify objects, see product information or read the barcode, etc.
So whether you’re on a photoshoot or you’re out on the street looking for inspiration for your shots, you may need to open Lens more than once to get information about your surroundings. The good news is that you can open Lens from the camera interface itself.
At the top, you’ll find the Lens icon along with the rest of the camera tools. So just tap the icon to open all the Google Lens features.
#6. Transform Boring Shots Into Stylish Photos
It often happens that the environment doesn’t match the shot we want to take, either because of the colours or because there is no diversity to create an interesting composition.
But you can apply a simple solution to give your photos a more interesting touch without spending too much time in post-production: filters.
You can choose, for example, the Portrait camera mode and try out the different filters available. There is an interesting assortment of options combining the effects of the most popular filters.
#7. Create Fun Montages by Cloning Objects or People
Another camera mode that will help you to create creative projects is “Clone”, which you can use with almost any object, or people.
The only requirement for this mode to work is that you don’t move your phone, so if possible, place it on a tripod to keep it stable. The dynamic is very simple, just keep in mind that there is a limit to the amount of cloning you can do for each composition.
That way, you will save yourself from applying tricks, wasting time in editing or complicating yourself with several editing applications.
#8. Enhance Your Photos With Gcam for Redmi Note 10
If you want to have a plus when taking pictures from your Xiaomi, you can take advantage of all the functions of the GCam.
No, you can’t install the app directly on your device, but you can use some ports shared by the developers to have a functional version of GCAM on your Redmi Note 10.
To do this, all you need to do is download the APK and follow a series of instructions, as explained in the following article. Note that not all GCam features may work, but you will have some extra options for your photos.
#9. Enable Automatic Corrections to Avoid Photo Distortions
If you don’t want to waste time taking the same photo over and over again, or in a later edit, you may want to turn on automatic corrections.
You will see that the camera settings have several options that allow you to anticipate certain situations and apply an automatic correction. For example, you have the option “Correct distortion on ultra-wide shots” which will prevent the famous wide-angle lens distortion.
So turning it on will save you some headaches. And the same action can be applied with the “Correct distorted faces in group shots” option.