
Let us start with the basics of what VPN is. Virtual Private Network (VPN) allows users to access area restricted sites, university/college tools from outside the institution, use banned websites from your workplace etc. Widely used on PC platform, it could be used on our mobile devices too. This enables us to see area restricted YouTube content or use your Whatsapp Messenger on a private network at the comfort of using them on your mobile.
Below are few methods through which you can use VPN on Android devices:
By using TunnelBear
- Install TunnelBear from play store. This is easily on of the best apps available in the market.
- Signup for free and activate your email.
- Just choose your proxy server country and switch on.
- And you are set!
- While the app is super convenient to use, there are downfalls to using this app. You can only access 500Mb/month of data under proxy for free. If you use VPN occasionally, this is your best bet. Other apps like TunnelBear are: Betternet, VPN master, SecureLine VPN.
By using Touch VPN
- Install TouchVPN from play store.
- Click on your proxy host country and connect. You’re set!
- Disadvantages of TouchVPN are: There are just too many ads and connection is very slow.
- Few honourable mentions of apps just like TouchVPN: FlashVPN, SuperVPN, OpenVPN.
By using integrated VPN support
All these aforementioned apps are third party services that have some pitfall or the other. Android also has integrated support for PPTP and L2TP VPNs. You can connect to these types of VPN’s without using any third party services. This is the more preferred way if you already have a proxy address that you would like to use. This is specially used by college students who use their university proxy to gain access to academic journals.
To use this method follow the underneath steps:
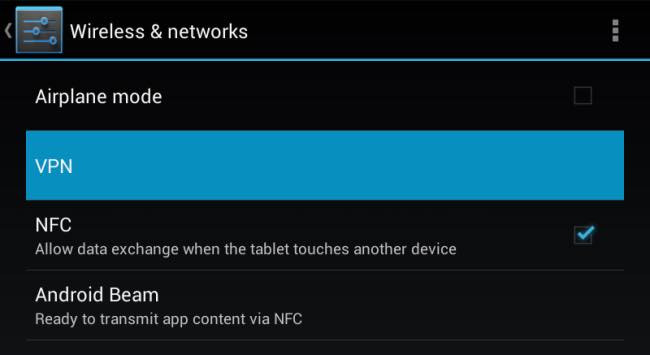
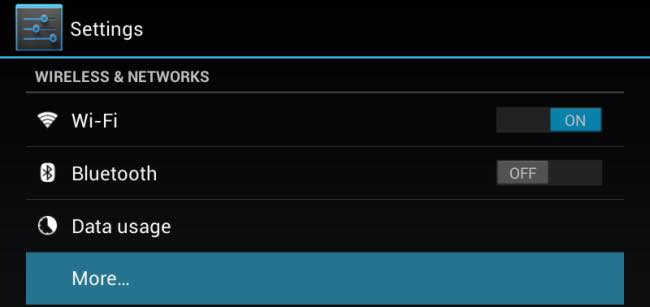
- Open Settings app and tap more under Wireless and networks. (On android 2.3 and below, tap Wireless and networks)
- Choose VPN option. (For Android 2.3 and below, tap VPN Settings.)
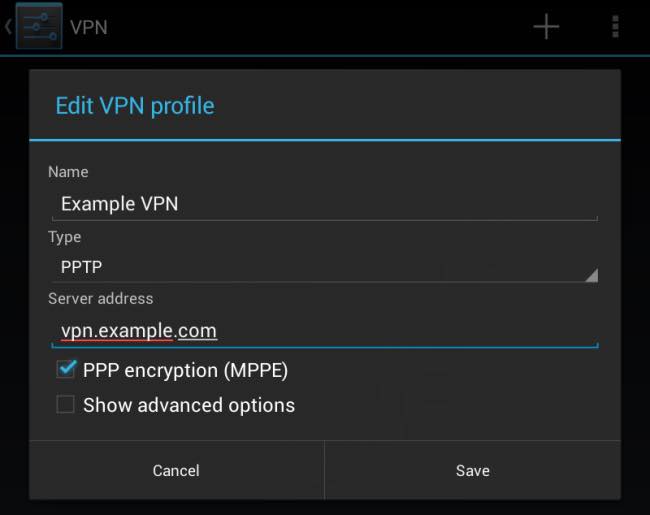
- Choose Add and provide your VPN details and select Save.
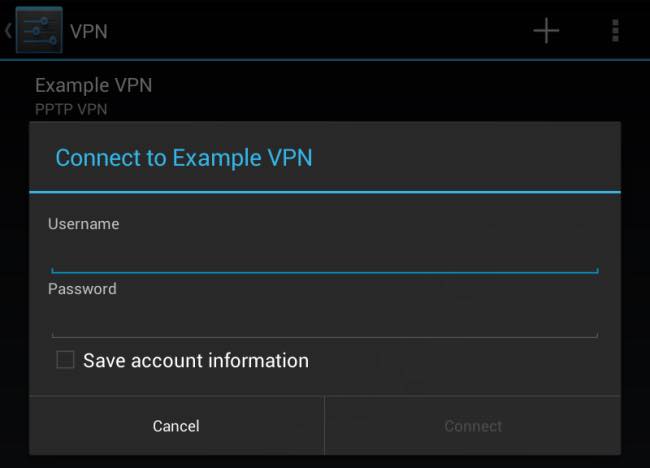
- Now type the username and password for your VPN account.
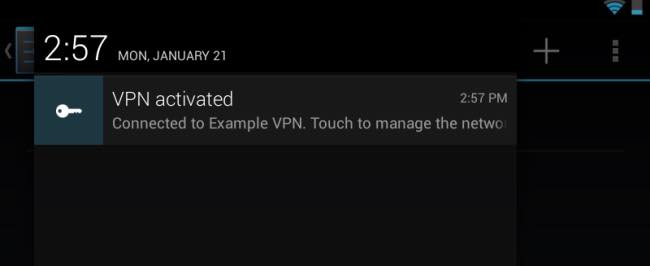
- You will get a notification that you VPN is activated. If you wish to disconnect, click on the notification and simply select Disconnect.
Always-On VPN Mode
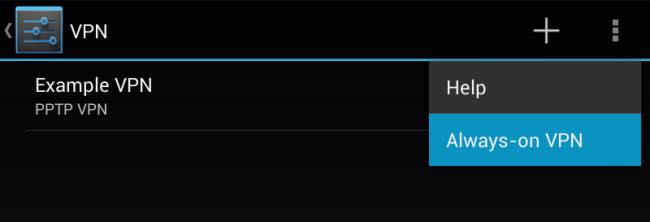
If you are an Android 4.2 or above user (2.3 or below versions require root to use this option) have the option called always-on VPN mode. This option enables us to always use VPN. This is particularly useful if you always use a public Wi-Fi. When you save your VPN details using the above method, you can
just select the menu option and activate this feature
.
VPNs is getting more and more useful when you are travelling in China, as they have very strict policies for online content. Here is the list of VPN that works in China, this might able to be help get around in China and access to restricted content such as Facebook and Youtube.


I use the vpn at arcvpn. It is working ok so far.
Wow that’s great!
Wow very informative post. You could have also mentioned the potential risks of using free VPNs. I used betternet on my Note 6 for a month and couldn’t help but notice that my phone got really slow and unresponsive. Prolly due to malware. No i’m using a much better paid service called Ivacy VPN.